


How Golf Sherpa can help you play them to perfection
Imagine you’re standing on hole 1 of Dundonald Links fighting against those first drive fears, knowing that somewhere out there waiting is 5 holes cunning enough to eat your scorecard for breakfast.
Thankfully, Golf Sherpa has carried out the trial & error (there was so much error!) & scouted every devilish detail of this awe-inspiring course. Use our advice below to help you make the most of your time on Dundonald’s luscious links & thanks us afterwards… after all every golfer wants a trip planned to a tee!
The crash & burn one
Hole 3 (par 5) - stroke index 6 – 530 yards (medal tees)
Dundonald doesn’t wait long before its initiation test, with a tricky first par 5 that leaves many asking’ so… where’s the miss?’ A focus grabbing burn snakes its way across the fairway for nearly 300 yards of prime landing area, forcing you to bail out left into a waiting fairway bunker, thick fescue or risk an early bath.
Golf Sherpa’s guide:
Not the sexiest option but lay-up short of the bunker & leave the hero shot for your second, aiming over the bushes or take the more conservative route & play one more shot on the left side of the ditch. Either way your approach should be to the left side of the green where you’ll have plenty of room to play with on a miss or if you’re lucky your ball feed nicely into the centre of the green from the raised slope.

The give the crowd a show one
Hole 9 (par 4) - stroke index 2 – 385 yards (medal tees)
While other holes tend to steal the limelight on the course this picturesque par 4 is anything but an easy finish to the front nine. A blind tee shot with lurking hazards then a forced carry to a well-protected green requires some exceptional in the moment mental gymnastics of course management.
Golf Sherpa’s guide:
Left is your friend on the blind tee shot to avoid the lurking fairway pot bunkers both centre & right. Then take an extra club & aim for the back of the green, taking the surrounding moat out of play & hopefully playing the back to front slope to leave you safely in the centre of the green. Don’t forget to take your bow from the applauding spectators watching from the Canny Crow bar.

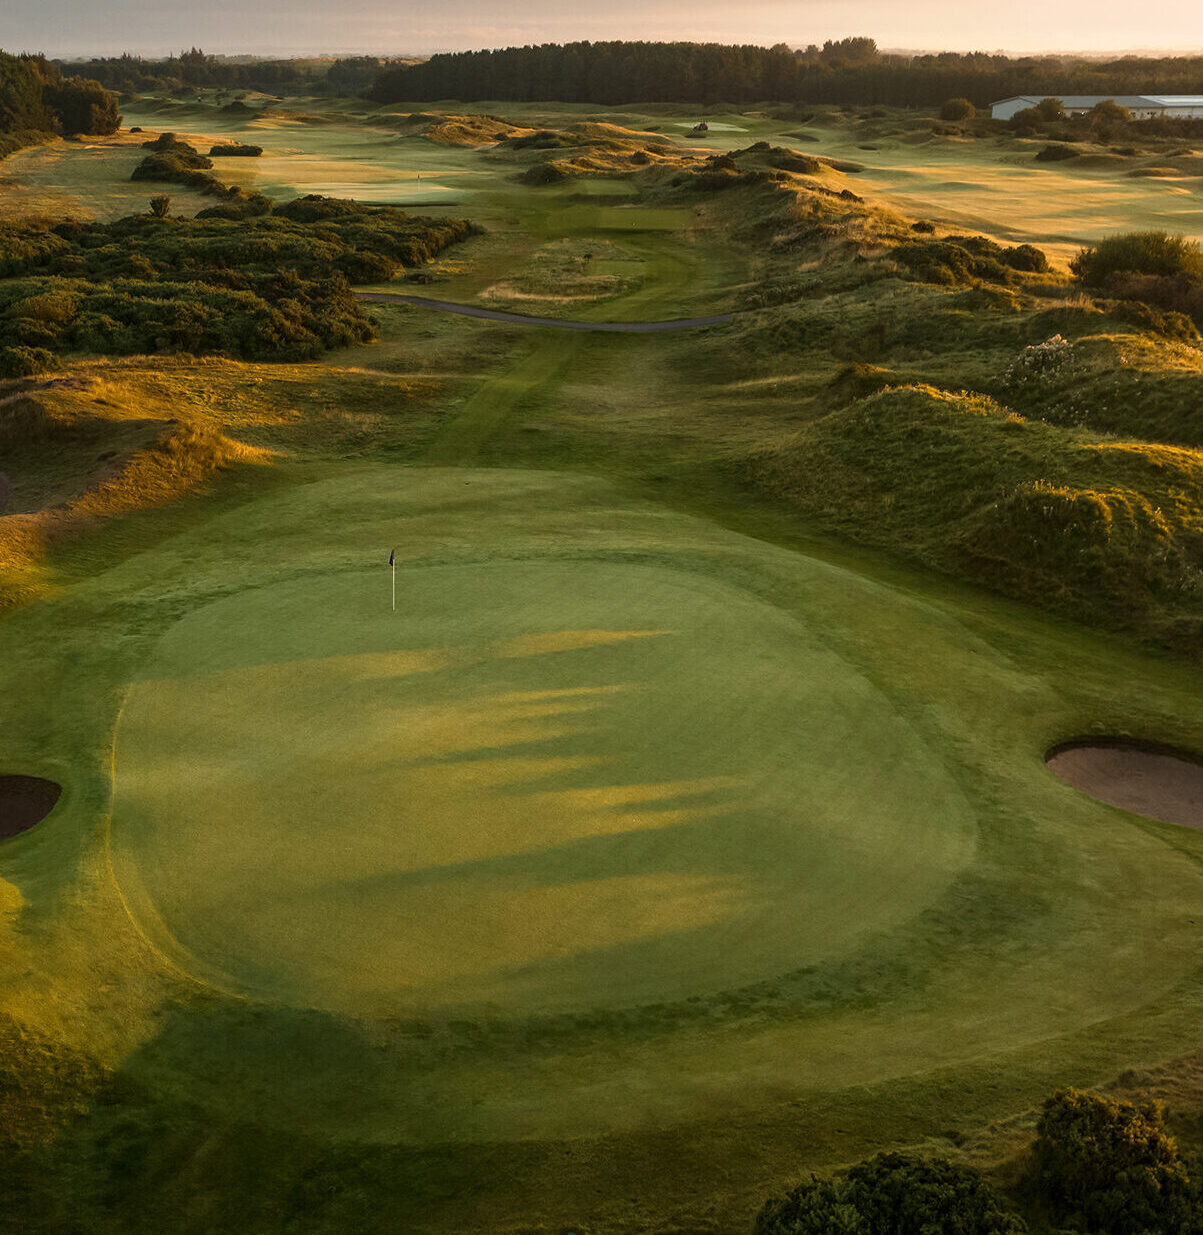
The blubbering Cauldron one
Hole 11 (par 4) - stroke index 17 – 120 yards (medal tees)
Don’t let the stroke index & length of this hole fool you, the 11th is a miniature assassin. 3 cavernous bunkers guard an upturned bowl green, goading golfers into going long to ensure the carry. However, doing so brings “The Cauldron”, one of Scotland’s more notorious & nasty bunkers, into play. An 11ft deep round wrecker of a bunker, which requires a shot to travel at least 20 yards or come rolling back down to your feet from the sloping green is enough to give anyone the fear.
Golf Sherpa’s guide:
Play over the right front bunker & your ball will gather towards the centre. If you’re lucky this will take the dreaded Cauldron bunker out of play. If you do find yourself blubbering away in the cauldron, don’t be afraid to accelerate through the ball & splash it up there. Trust us, too hard & off the green at the other side is better than a second shot from your footprints.

The off-the-rails one
Hole 13 (par 4) - stroke index 9 – 370 yards (medal tees)
From the off set your choices don’t look great on this memorable par 4, either risk putting one OB on the parallel train tracks or bail out into a waiting fairway bunker. If you somehow manage to navigate those, you must have pinpoint accuracy with your approach shot to stay on the two-tier green & not roll off into the bunkers or waiting burn.
Golf Sherpa’s guide:
Use your irons, aim for the top tier and just hope you don’t have a downward putt towards the burn. It is a stunning & challenging hole, just be sure to look up & appreciate the Isle of Arran scenery while navigating your way around.

The penultimate one
Hole 17 (par 4) - stroke index 7 – 420 yards (medal tees)
On track for your lowest score ever? Looking to close out the match-play? This is the siren hole, calling to you, willing you to become the next Jean van de Velde.
A sharp dogleg left with what looks like a flat reachable landing area may tempt most to cut the corner & chance their luck with the bunkers.
Golf Sherpa’s guide:
Just a reminder, you’re not prime Tiger Woods, even if you clear the raised bunkers, you’ll find two more hidden ones readily awaiting your ball. A shot out to the right gives a longer second shot, but it provides an approach which feeds into a receptive green letting you finish the round in style.

Clubhouse thoughts:
Sure, you could tackle this experience without a guide, fumbling yardages, searching for lost balls, shovelling sand in frustration. But why?
Golf Sherpa has been created by 3 friends who looked at package golf trips & thought “Wouldn’t this be better if…”. We genuinely care about making your trip great & that’s why we take care of all of the on-course & off-course planning, letting you focus on what’s important to you, whether your seeking competitive competition, wanting to unearth hidden gem courses or just find the best place to relax & make memories with friends.